A couple of days ago, I announced the release of our new XamGantt and XamSyntaxEditor CTP controls. By now you have probably seen the “Getting Started with the XamSyntaxEditor” post. Well now it’s time to get to know the XamGantt control. If you have ever seen Microsoft Project, you already know what a Gantt control is. If you haven’t, well it’s basically a type of bar chart that illustrates a project schedule allowing you to represent the phases and activities of a project. These activities can also have dependencies, or relationships between other activities. To get a complete understanding of what a Gantt is, I suggest hitting up your favorite search engine and doing the proper amount of research. As for our XamGantt control; it’s a WPF and Silverlight cross-platform control that provides Microsoft Project style Gantt functionality. So it’s like taking Microsoft Project, getting rid of all the useless stuff, and cramming it into a beautiful, lightweight, and high performance control that can be dragged into your WPF and Silverlight applications. Pretty freaking cool, right?
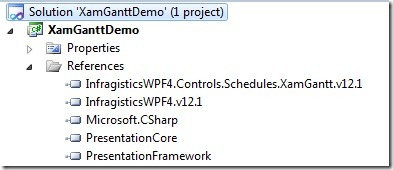
Enough chitter-chatter, lets start writing some code. Make sure you have the latest May 2012 Service Release installed and then go get the CTP bits from your Infragistics account. Now create a new WPF application, or Silverlight if you prefer, and add our references to the XamGantt CTP.

Now open your MainWindow.xaml, or whatever you called it, and add the “ig” namespace to your view.
xmlns=”http://schemas.microsoft.com/winfx/2006/xaml/presentation”
xmlns:x=”http://schemas.microsoft.com/winfx/2006/xaml”
xmlns:ig=”http://schemas.infragistics.com/xaml”
Title=”MainWindow” Height=”350″ Width=”525″ >
</Window>
Now add an instance of our XamGantt control to our View.
<ig:XamGantt />
</Grid>
Now we have a XamGantt control declared in our view. What we need now is to populate it with some data. The XamGantt utilizes a Project class which is the primary class in the XamGantt assembly. It manages the data for the project – that is, the tasks, resources and calendars. It has a built-in scheduling engine similar to that of Microsoft Project that will adjust the dates of tasks based on their constraints, deadline, predecessors/successors, etc.
The main properties of the Project class are:
- Start – The DateTime that represents the start of the project. When ScheduleFromStart is true, this property should be set to the start of the project. When ScheduleFromStart is false, the Finish must be set and the Start will be calculated and set by the scheduling engine.
- Finish – The DateTime that represents the finish of the project. When ScheduleFromStart is false, this property should be set to the end date of the project. When ScheduleFromStart is true, the Start must be set and the Finish will be calculated and set by the scheduling engine.
- ScheduleFromStart – Determines whether the schedule is calculated based upon the specified Start date or Finish date. When ScheduleFromStart is true, which is the default value, the scheduling engine uses the Start date to calculate the dates of the tasks and sets the Finish property to the calculated finish date for the project. When set to false, the scheduling engine uses the Finish date to calculate the Start date for the project.
- RootTask – A read-only property that returns the Project task instance that represents the project summary. The tasks associated with the project are maintained as a tree structure where the Parent property returns the parent ProjectTask and the Tasks property returns the collection of the direct children of that task. All tasks within the project are descendants of the RootTask.
- Settings – A ProjectSettings instance that maintains settings that affect many aspects of the project.
Now there is another type of Project which is called a ListBackedProject. The ListBackedProject class derives from the project class and provides the ability to populate the tasks based on a flat collection of task information. It exposes a TaskItemsSource and associated property mappings to allow population of the tasks collection for a flat list of tasks.
So if you are going to be using the control where your tasks will be coming from your own collection, then you would use the ListBackedProject. If you are going to be populating the tasks programmatically or just loading a Project XML file, then you can use the Project class.
For my purposes I will be using the Project class and programmatically adding tasks in my ViewModel. Oh yes, you read that correctly. My ViewModel. You will hardly ever see me write code that is not MVVM.
{
private Project _project;
public Project Project
{
get { return _project; }
set
{
_project = value;
NotifyPropertyChanged(“Project”);
}
}
public XamGanttViewModel()
{
LoadDefaultProject();
}
private void LoadDefaultProject()
{
Project = new Project();
var parent = new ProjectTask
{
TaskName = “Project Summary”,
Manual = false,
};
Project.RootTask.Tasks.Add(parent);
parent.Tasks.Add(new ProjectTask
{
TaskName = “Create specification and requirements”,
Manual = false,
Start = DateTime.Today.AddHours(8).ToUniversalTime(),
ManualDuration = ProjectDuration.FromFormatUnits(4, ProjectDurationFormat.Days),
});
parent.Tasks.Add(new ProjectTask
{
TaskName = “Create a demo”,
Manual = true,
Start = DateTime.Today.AddHours(8).ToUniversalTime(),
Duration = TimeSpan.FromHours(16),
Estimated = true,
});
parent.Tasks.Add(new ProjectTask
{
TaskName = “Implementation”,
Manual = true,
Start = DateTime.Today.AddHours(8).ToUniversalTime(),
DurationText = “A couple Of days”,
});
parent.Tasks.Add(new ProjectTask
{
TaskName = “Testings”,
Manual = false,
Active = false,
Start = DateTime.Today.AddHours(8).ToUniversalTime(),
Duration = TimeSpan.FromHours(12)
});
parent.Tasks.Add(new ProjectTask
{
TaskName = “0 day Milestone”,
Manual = false,
Start = DateTime.Today.AddHours(8).ToUniversalTime(),
Duration = TimeSpan.Zero
});
parent.Tasks.Add(new ProjectTask
{
TaskName = “2 day Milestone”,
Manual = false,
Milestone = true,
Start = DateTime.Today.AddHours(8).ToUniversalTime(),
Duration = TimeSpan.FromHours(8 * 2)
});
}
#region INotifyPropertyChanged
public event PropertyChangedEventHandler PropertyChanged;
protected void NotifyPropertyChanged(string propertyName)
{
var handler = PropertyChanged;
if (handler != null)
PropertyChanged(this, new PropertyChangedEventArgs(propertyName));
}
#endregion //INotifyPropertyChanged
}
As you can see in my ViewModel (which implements INotifyPropertyChanged), I have a property called Project which is of type Project. In the constructor of my VM I simply create a new Project instance, and then start assigning ProjectTasks to it.
What’s a project task? The ProjectTask class represents a single task within a Project. Each Project exposes a single ProjectTask, via the RootTask of the Project, that represents the project summary for the Project. All tasks associated with that project are descendants of that task. Here are some properties you might care about:
- TaskName – Represents the name of the task.
- Tasks – The collection of child tasks. A ProjectTask that has child tasks will have its Summary property set to true and will be represented as such in the UI.
- Start – Gets/sets the start date of the task.
- Duration – Gets/sets the duration of the task.
- Milestone – A get/set Boolean that is used to indicate if the task should be represented as a milestone. By default a task with a 0 duration is considered a milestone but a task with a duration may be explicitly made into a milestone by setting this property to true.
- Summary – A read-only Boolean indicating if the task is a summary. A summary task is one that contains one or more tasks in its Tasks collection. Also, the project summary (Project.RootTask) is also considered a summary.
- Manual – A get/set Boolean that is used to determine whether the task is manually or automatically scheduled.
- Active – A get/set Boolean indicating if the task affects the project schedule.
- PercentComplete – A get/set decimal value from 0 to 100 that represents the percentage of the duration for the task that has been completed.
There are quite a few more, but I don’t want to bore you with that stuff. That’s what our great documentation is for. Let’s get back to writing code. Don’t forget to set the DataContext of your View to an instance of our ViewModel and set your binding accordingly.
<ig:XamGantt Project=”{Binding Project}” />
</Grid>
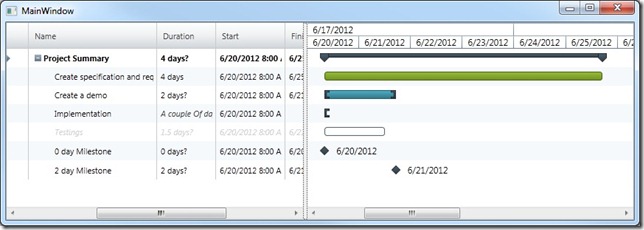
Run the application and lets see what we’re working with.
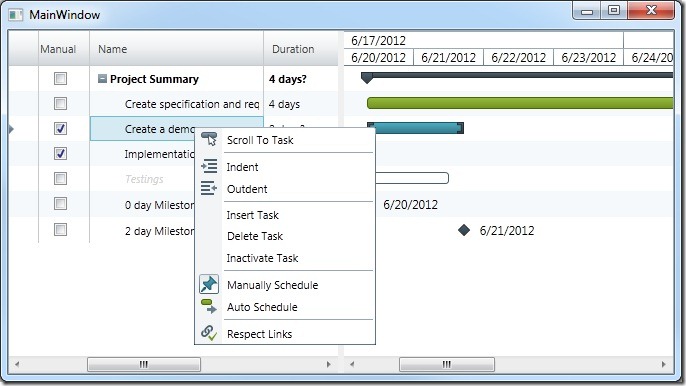
Where’s my easy button? Because I would be hitting it right about now! Go ahead and select a task and right click it. You will see a context menu show up with all the cool things you can do.

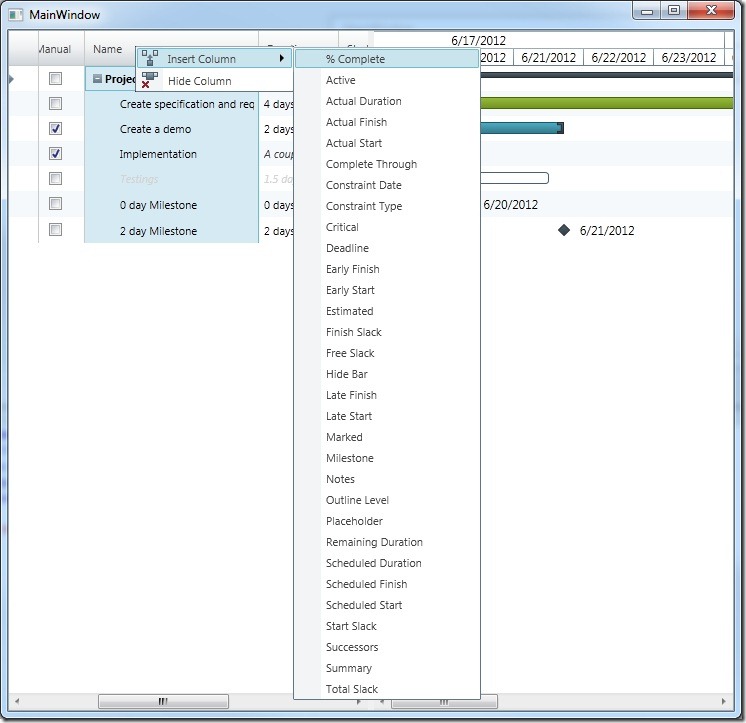
We also provide the ability for you to modify your columns.
This control is packed with features! So many features that this post would wind up being 23 pages long if I tried to cover them all. I will be blogging about different features of this control and slowly build upon this example. Eventually this will be a Microsoft Project replacement!
Keep in mind, this is a CTP. Just wait until we RTM this baby. So download the source, and let me know what you think.


